Contact
Write to Us And We Would Be Happy to Advise You.
Do you have any questions, or would you like to speak directly with a representative?
By hqt
It is significant to know that how to build diy membrane switch keypad. Membrane switches can be caused by a number of reasons, among which the most common is excessive finger pressure on the button and contamination of the contact pads.
After finishing work, you need to make sure that the buttons do not stick and provide reliable contact with a light touch.
The contact at the point of attachment of the loop most often break due to the oxidation of the corresponding tracks. Therefore, the first thing to do is to degrease them thoroughly. Sometimes destruction of the tracks finds which also leads to a breakdown in contact.
The best way to avoid damage to the touch membrane switch when using the microwave is to install it away from the fumes that accompany the cooking process on a gas stove. Moreover, it is also necessary to know about how to build diy membrane switch keypad. It will also help to extend the life of the sensor, following these rules for using the microwave oven:
Moreover, it recommends not to turn on the microwave oven to the power supply without a voltage stabilizer. This will avoid voltage susrges that could damage the conductive parts of the touch membrane switch.
The microwave oven is one of the most demanded household electrical appliances. Quite often, when purchasing a microwave oven, potential consumers opt for models equipped with a touch membrane switch and to know how to build diy membrane switch keypad. As of today, this type of microwave oven is the most popular in the domestic market.
Microwave ovens with touch control differ from other models of microwave ovens:
However, such microwave ovens have one significant drawback – the control unit equipped with a touch membrane switch requires careful handling during operation and does not tolerate voltage surges in the power supply network.
Unfortunately, in modern conditions, it is practically impossible to provide gentle working conditions for microwave ovens. Therefore, sensor control units (CU) often fail. In this case, the cause of the malfunction may be caused by the fact that the buttons on the microwave do not work.
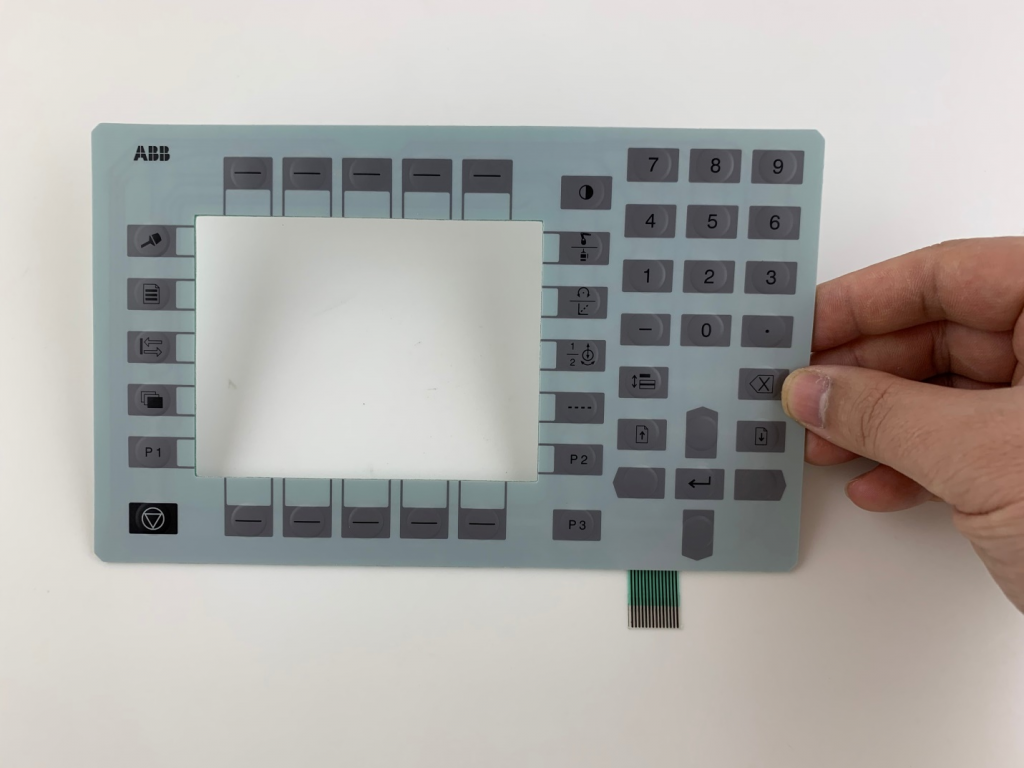
It is important for you to know about how to build diy membrane switch keypad. The touch-sensitive (sometimes called membrane) membrane switch is a compact three-layer membrane structure that does not have separate moving mechanical parts.
On two films, in the places where the keys (buttons) are located, there are contact pads that are interconnected by conductive tracks.
Between them is an adhesive mask with slots (holes) that allow the contact pads to touch when pressed lightly. The operation of the membrane switch is ensured by the high flexibility of the constituent elements.
The touch membrane switch, with which the user controls the operation of the microwave oven, is the weakest point of such a sufficiently reliable electrical engineering. The microwave oven reacts to the breakdown of the touch buttons with unpredictable behavior, for example:
At the same time, the problem can also suddenly disappear, and after a while it appears again. Furthermore, you need to learn about how to build diy membrane switch keypad.
All malfunctions due to which the touch membrane switch stopped working can be divided into three groups:
Dismantling
To repair a membrane switch with touch buttons, you will need:
Other than how to build diy membrane switch keypad, before starting repairs with your own hands, the microwave oven must be disconnected from the power supply. Next, the microwave needs to be disassembled.
To access the touch membrane switch, you need to separate the front panel from the case by unscrewing all the screws that secure them. Such screws can even be located on the bottom.
Then it is necessary to dismantle the control unit. To do this, unscrew the protective panel and remove the control unit from it. This will open access directly to the touch membrane switch. If you know that how to build diy membrane switch keypad then it’s easy for you having disconnected the cable, you can start repairing the buttons that do not respond to a light touch.
Disassembling the membrane switch must do very carefully and carefully. First of all, you need to stratify the three-layer “sandwich”. To do this, pry the corner of one of the films with a clerical knife, intercept it with your fingers and smoothly separate the layer from the base.
Before starting repair operations, it is necessary to visually inspect the films for signs of oxidation of the contact pads and damage to the conductive tracks.
Moreover, particular attention is paid to checking how to build diy membrane switch keypad and their status in the area where the buttons are not working. If it was not possible to visually detect damage, it is necessary to check the integrity of the tracks using a multi-meter.
Membrane switches can be caused by a number of reasons, among which the most common is excessive finger pressure on the button and contamination of the contact pads.
Furthermore, it is necessary to know eliminate the causes of “sticking” by slightly increasing the distance between the upper and lower films.
Do you have any questions, or would you like to speak directly with a representative?