How to Install a Rubber Keypad?
Table of Content:
- 1.Understanding Rubber Keypads
- 2.Tools and Materials Needed
- 3.Preparing for Installation
- 4.Removing the Old Keypad (if applicable)
- 5.Cleaning the Surface
- 6.Positioning the Rubber Keypad
- 7.Securing the Keypad
- 8.Testing the Keypad Functionality
- 9.Troubleshooting Common Issues
- 10.Frequently Asked Questions
- 11.Conclusion
Introduction
Rubber keypads are commonly used in various electronic devices, providing a tactile interface for users to input commands. If you’re looking to install a rubber keypad yourself, this comprehensive guide will walk you through the process step-by-step. With detailed instructions and helpful tips, you’ll have your rubber keypad installed and ready to use in no time!
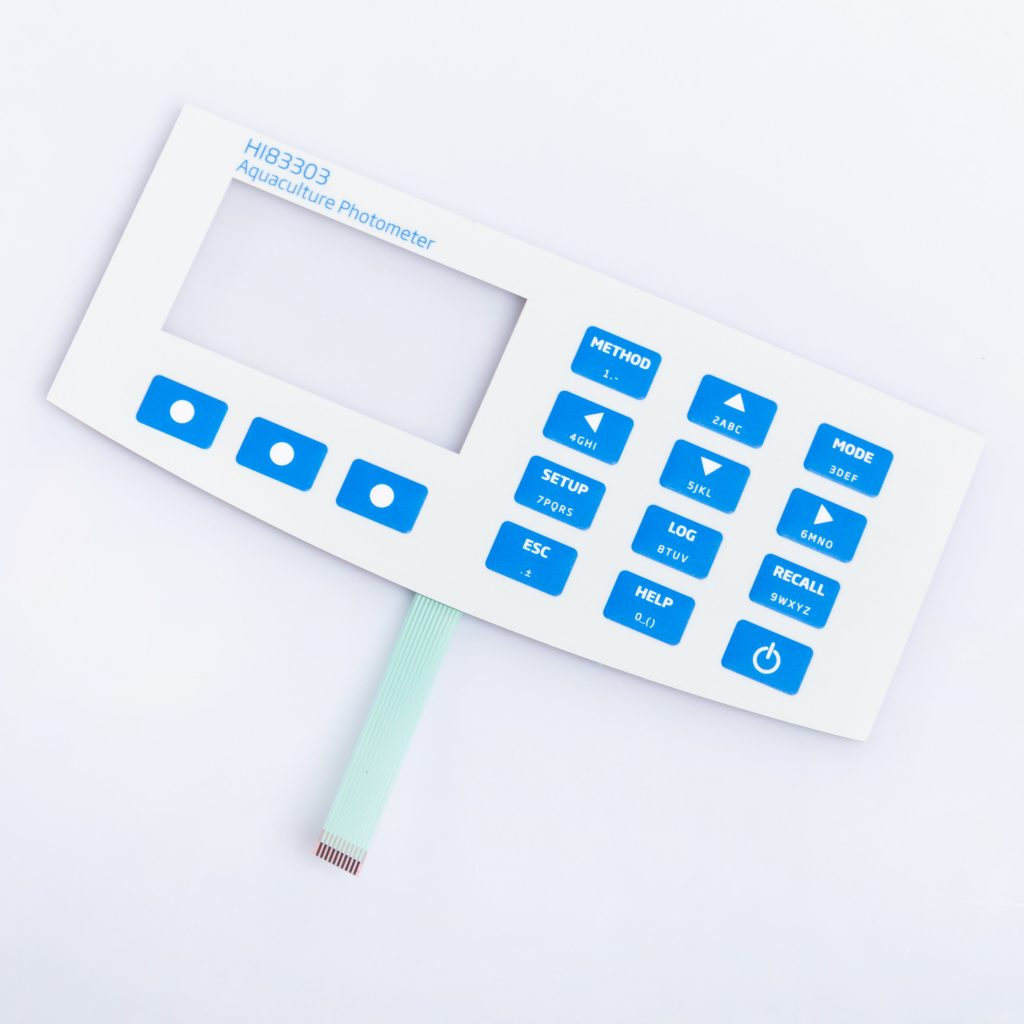

Table of Contents
-
1.Understanding Rubber Keypads
Before diving into the installation process, it’s important to understand the basics of rubber keypads. Rubber keypads consist of a rubber overlay with molded buttons that provide a soft and responsive touch. These keypads are commonly found in electronic devices such as remote controls, calculators, and industrial control panels.
-
2.Tools and Materials Needed
To install a rubber keypad, you’ll need the following tools and materials:
- Rubber keypad
- Adhesive (preferably an adhesive designed for rubber keypads)
- Cleaning solution (isopropyl alcohol works well)
- Cotton swabs
- Microfiber cloth
- Tweezers (optional, for precise positioning)
- Scissors (if trimming the keypad is necessary)
-
3.Preparing for Installation
Before installing the rubber keypad, ensure that you have a clean and well-lit workspace. Gather all the necessary tools and materials, and familiarize yourself with the keypad’s design and button layout.
-
4.Removing the Old Keypad (if applicable)
If you’re replacing an existing keypad, you’ll need to remove it before installing the new one. Refer to the device’s user manual or online resources for specific instructions on how to remove the old keypad.
-
5.Cleaning the Surface
Clean the surface where the rubber keypad will be installed to ensure proper adhesion. Use a cleaning solution, such as isopropyl alcohol, and a microfiber cloth to remove any dirt, dust, or residue. Pay close attention to crevices and hard-to-reach areas.
-
6.Positioning the Rubber Keypad
Carefully position the rubber keypad over the designated area, aligning it with the buttons or contacts on the device. Use tweezers for precise placement if necessary. Ensure that the keypad fits snugly and aligns correctly with the device’s buttons.
-
7.Securing the Keypad
Apply a suitable adhesive to the back of the rubber keypad. It’s recommended to use an adhesive specifically designed for rubber keypads, as it provides better bonding and flexibility. Follow the adhesive manufacturer’s instructions for the best results.
-
8.Testing the Keypad Functionality
After securing the keypad, test its functionality by pressing each button. Ensure that all buttons respond correctly and provide the desired tactile feedback. If any buttons feel unresponsive or sticky, reposition the keypad and test again. Make any necessary adjustments until the keypad functions smoothly.
-
9.Troubleshooting Common Issues
If you encounter any issues during or after installation, here are some common problems and their solutions:
- Keypad not sticking: Ensure that the surface is clean and free from any residue. Use an adhesive suitable for rubber keypads, and apply it evenly on the back of the keypad.
- Buttons not responsive: Check the alignment of the keypad with the device’s buttons. Reposition the keypad if necessary. If the issue persists, contact the manufacturer for assistance.
- Keypad doesn’t fit: If the rubber keypad is too large for the designated area, you may need to trim it with scissors. Be cautious while trimming to avoid damaging the keypad.
- Tactile feedback is weak: This could be due to an incorrect adhesive or poor alignment. Ensure that the adhesive used provides the desired flexibility and that the keypad is properly aligned.
-
10.Frequently Asked Questions
Can I install a rubber keypad on any device?
Rubber keypads can be installed on a wide range of devices, including remote controls, calculators, and industrial control panels. However, it’s essential to ensure compatibility with the device’s design and button layout.
Do I need any special skills to install a rubber keypad?
Installing a rubber keypad doesn’t require any specialized skills. With proper preparation and attention to detail, anyone can successfully install a rubber keypad.
Can I reuse a rubber keypad?
In most cases, rubber keypads are not designed to be easily removed and reused. It’s recommended to purchase a new rubber keypad for each installation to ensure optimal performance.
How do I clean a rubber keypad?
To clean a rubber keypad, use a cleaning solution such as isopropyl alcohol. Apply the solution to a cotton swab or microfiber cloth and gently wipe the keypad’s surface. Avoid using abrasive cleaners or excessive moisture.
Are rubber keypads water-resistant?
Rubber keypads are generally resistant to water and moisture. However, the level of water resistance may vary depending on the specific keypad design and manufacturer. It’s always best to refer to the keypad’s specifications or contact the manufacturer for detailed information.
Can I install a rubber keypad on a touchscreen device?
Rubber keypads are primarily designed for devices with physical buttons. Touchscreen devices require a different type of input technology, such as capacitive touch. Installing a rubber keypad on a touchscreen device may not provide the desired functionality.
-
11.Conclusion
Installing a rubber keypad is a straightforward process that can enhance the usability and tactile experience of your electronic devices. By following the steps outlined in this guide, you’ll be able to install a rubber keypad with ease. Remember to choose the right adhesive, clean the surface thoroughly, and ensure proper alignment for optimal performance. Enjoy the enhanced user experience that a rubber keypad provides!
If you need more, please contact us
- Introduction to Membrane Switch with Embossed Keys
- Introduction to Membrane Switch with Embossed Keys
- Metal Dome: Bad Clicking Feel and How to Fix It
- Tactile Switch vs. Membrane Switch: Which One Should You Choose?
- Production Process of Membrane Switch Assembly
- Exploring Membrane Switches in China
- The Benefits of Protective Topcoats for Membrane Switches
- The Dos and Don’ts of Choosing a Keypad: What You Should Know
- When to Choose a Flexible Printed Circuit Board
- Embossed vs. Debossed Keypads: What’s the Difference?
- How Do Capacitive Switches Work? A Comprehensive Guide
- How to Choose Light Guides: What You Should Know
- Membrane Switch for Mining: Key Features and Essential Tests
- Understanding the Differences Between LED Array vs. LED Edge-Lit Backlighting for Membrane Switches
- Mastering Color Mixing for Membrane Switches and Graphic Overlays
- Making Prototypes Before Mass Production: Is It Important for Membrane Switches?
- Everything You Need to Know About Back Adhesive on Graphic Overlays
- An Introduction to Capacitive Touch Membrane Switches
- 7 Essential Tips for the Safe Transportation and Storage of Acrylic Sheets
- Essential Maintenance Tips for Flexible Printed Circuits
- Evolution of Membrane Switch Technology: A Revolutionary Journey
- Custom Membrane Manufacturing: A Comprehensive Guide
- Cixi Membrane Switch Factory: Leading Manufacturer of Membrane Switches
- Revolutionizing Portable Devices: The Power of Low-profile Membrane Switches
- 5 Essential Insights for Designing Membrane Switches for Harsh Environments
- Potential of Multifunctional Membrane Switches
- The Ultimate 5-Step Membrane Switch Repair and Maintenance Guide
- The Ultimate Guide to Choosing Overlay Material for Membrane Switches: Unlocking Durability and Style
- Unveiling the Potential of Multifunctional Membrane Switches: A Technological Marvel
- Membrane Switch Customization Design Tips
- Introduction to Unique Graphics for Membrane Switches
- Which to Choose? Membrane Switch vs. Touch Screen
- FPC Membrane Switch for Polyimide Layer
- What is the general thickness of a Membrane switch? Why does thickness selection make a difference?
- Embossed Graphic Membrane Switch: Combining Form and Function
- Dome Retention Membrane Switch: The Ultimate Guide
- How to Design the Conductive Trace of Membrane Switch?
- What is the general circuit closing resistance of a Membrane switch?
- What does Bond Strength in the adhesive of Membrane switch stand for?
- SMT Components for Membrane Switch: Revolutionizing User Interfaces
- The Advantages and Disadvantages of Laser Etching in Membrane Switches
- Why Does the Flex Tail of Membrane Switch Need Mylar?
- The Benefits of Membrane Switches with Gold Contact Surfaces
- Will the Chemical Resistance of Membrane Switch be that good? Did you choose any special materials?
- What are the General Options for the Back Panel of a Membrane Switch?
- What should I pay attention to in the User Interface of Membrane Switch?
- RFI/EMI Shielding: Protecting Electronics in the Modern World
- What types of Pressure Sensitive Adhesive options are there for Membrane Switch?
- What are the Overlay Material Options for Membrane Switches?
- Input Device Membrane Switch: A Revolutionary Technology
- Why is the Gloss Finish of Membrane Switch Not Suitable for Outdoor Use?
- Why is the Gloss Finish of Membrane Switch Not Suitable for Outdoor Use?
- Advantages of Digital Printing's Membrane Switch
- Where Can UV Resistance’s Membrane Switch Be Used?
- Why is the Transparent Windows of Membrane Switch not so easy to scratch?
- Why is Membrane Switch’s Tactile Metal Dome so important?
- What are the Panel Substrate Material Options for a Membrane Switch?
- What are the options for Rear Adhesive Layer of Membrane switch?
- Panel Cutouts of Membrane Switch: A Comprehensive Guide
- Operating Force for Membrane Switch: The Key to Responsive Interfaces
- Membrane Switch Artwork: Combining Functionality and Aesthetics
- Membrane Switch Advantages: Simplifying User Interface Design
- Membrane Switch Actuation Point: A Closer Look
- Understanding Membrane Switch 3 Button Technology: A Comprehensive Guide
- Unveiling the Membrane Silent Switch: A Technological Marvel
- Understanding the Membrane Rubber Dome Switch: A Comprehensive Guide
- Membrane Repair Switch: A Fascinating Mechanism in Our Body
- Understanding Membrane Panel Switch Symbols: A Comprehensive Guide
- Membrane Panel and Switch: The Unsung Heroes of Modern Electronics
- Exploring the Membrane Mushroom Switch: A Guide to This Innovative Technology
- Membrane Longplay Switch: The Ultimate Gaming Experience Unveiled
- The Marvels of Membrane Keypad Switches with LED: A Comprehensive Guide
- Membrane Keypad Matrix Switch 1x4: The Ultimate Guide
- Membrane Keyboard Switch Definition: Unlocking the Secrets of this Modern Input Device
- Membrane Key Switch Supplier: Unveiling the Innovation in Keyboard Technology
- Membrane Key Switch Review: Unlocking the Secrets to Better Typing
- Unlocking the Potential: A Comprehensive Guide to Membrane Key Switch Keyboards
- Membrane Key Switch Factory: Crafting Quality Input Devices
- Membrane Foil Switch: A Revolutionary Technology
- Membrane Flexible Switches: The Unsung Heroes of Modern Technology
- Membrane Edge Trigger Switches: Revolutionizing User Experience
- Understanding Membrane Driving Light Switch: A Comprehensive Guide
- Melrose Membrane Switch: Revolutionizing User Interfaces
- Exploring Medical Equipment Membrane Switches: A Vital Component in Modern Healthcare
- Mechanical vs. Membrane Switches: A Battle of Keyboards
- Mechanical vs. Membrane Switch: Making the Right Choice for Your Keyboard
- Mechanical Membrane Keyboard Switches: The Perfect Blend of Technology and Comfort
- Mechanical Keyboard Switches vs Membrane: A Deep Dive
- Mechanical Keyboard Switches vs Membrane: A Deep Dive
- Mechanical Keyboard Switch vs Membrane: Which One Should You Choose?
- Mechanical Key Switch Feels Like Membrane
- Metal Dome: Bad Clicking Feel And How to Fix It
- Silver Paste And Conductive Carbon Paste in Membrane Switches
- Introduction to Membrane Switch with Embossed Keys
- Development Trend of Membrane Switches
- Silkscreen Printing of Membrane Switches: Indicators And Issues
- 12 Inspection Rules for Membrane Switches
- Introduction to Conductive Ink for Membrane Switches
- Making Screen: Why Is It Crucial for Membrane Switch
- How to Enhance the Durability of Non-Tactile Switch Membrane Switches
- Non-Tactile Switch Membrane Switch: How to Determine its Functionality?
- Non-Tactile Switch Membrane Switch: How to Determine its Functionality?
- Something You Need to Know about Membrane Switch Metal Domes
- Production Process of Membrane Switch Assembly
- Inspections And Tests of Membrane Switch
- How to Troubleshoot A Damaged Membrane Switch
- Why do membrane switches have MP and LSE adhesives? What's the difference between them?
- Advanced Considerations in Tail Exit Design for Membrane Switches
- Understanding Tail Exit in Membrane Switch Design
- Enhancing Tactile Feedback in Membrane Switches: The Niceone-Keypad Advantage
- Comparative Analysis of DT and 3M Adhesive Papers in Membrane Switches
- Understanding the Spacer Layer in Membrane Switches
- Innovative Use of Conductive Inks in Medical Devices: Insights from Niceone-keypad
- Introduction to Silver Conductive Ink in Medical Products
- Polyester Substrate Membrane Switch: A Cutting-Edge Interface Technology
- The Impact of Graphic Overlay Material on Membrane Switch Performance
- Graphic Overlay Membrane Switch: Revolutionizing Interface Technology
- Membrane Switches
- How to Customize Graphic Overlay Membrane Switches for Specific Applications
- Graphic overlay membrane switches come with a variety of surface textures, each offering distinct advantages and disadvantages:
- "Optimizing Emergency Medical Response with Backlit Membrane Switches"
- "Enhancing Patient Safety with Backlit Membrane Switches in Medical Devices"
- "The Rising Popularity of Backlit Membrane Switches in Medical Products"
- "The Advantages of Flex Copper Circuits in Backlight Membrane Switch Applications"
- "Energy Efficiency in Medical Devices: The Role of Flex Copper Circuit Membrane Switches"
- "The Impact of Low Electrical Resistance in Flex Copper Circuits on Medical Device Performance"
- "The Technical Superiority of Flex Copper Circuits in Enhancing Critical Medical Devices"
- "Optimizing Agricultural Machinery with the Right Flexible Circuit Membrane Switch: A Comparative Analysis of Flex Copper Circuits and Conventional Silver Ink Circuitry"
- An In-depth Analysis of Flexible Circuit Membrane Switches: Focusing on Materials, Costs, and Industry-Specific Applications"
- "Enhancing Medical Devices with Flexible Circuit Membrane Switches: The Crucial Role of Material Selection"
- Can the Tactile Feedback of a Dome Switch Be Adjusted?
- Can Dome Switch Keypads Be Waterproof?
- Integrated Article on Customizing Dome Switch Keypads
- parameter table for membrane switches
- History and Evolution of Dome Switch Keypads: A Comprehensive Overview
- Brief Overview of Dome Switch Keypads
- Embossing Membrane Switch: A Guide to Functionality and Applications
- Embossing Membrane switch
- What Makes Dielectric Ink Membrane Switches Different from Traditional Switches?
- Environmental Considerations in Manufacturing Switches
- What is the most cost-effective circuit layer for a membrane switch?
- The Environmental Benefits of Using LED Backlighting in Membrane Switches
- Advantages of Using LED Backlight in Membrane Switches for Temperature Control
- What are the Long-Term Effects of Excessive Heat on Membrane Switches?
- How to Reduce Heat Generated by LED Backlights in Membrane Switches
- Are there significant cost differences between white and colored LEDs for membrane switches?
- Can Colored LEDs Be Used Effectively in Membrane Switches?
- What are the Primary Benefits of Backlighting in Membrane Switches?
- Which Backlighting Technique Offers the Most Uniform Light Distribution for Membrane Switch?
- Do LED Backlights Affect the Actuation Force of a Membrane Switch?
- Can the Membrane Switch Actuation Force be Adjusted?
- How does the actuation force affect the lifespan of a membrane switch?
- What is the Ideal Actuation Force for a Membrane Switch?
- Understanding Actuation Force in Membrane Switches
- Can Damaged PU Coated Silicone Buttons be Repaired?
- Enhancing the Touch Sensitivity of Capacitive Membrane Switch of Coffee Maker Controls
- Should I choose PET, FPC or PCB as the circuit for the capacitive membrane switch of my Coffee maker controls?
- Should I choose PET as the panel or PC as the panel for my capacitive membrane switch of Coffee maker controls?
- How to Improve the Aesthetics of Capacitive Membrane Switches in Coffee Maker Controls?
- Why do coffee maker controls often use capacitive membrane switches as operating systems?
- Capacitive Membrane Switch for Coffee Maker Controls
- PU Coating and Silicone Keypads
- Are there alternatives to PU coating to protect silicone keys?
- Why is Visibility So Important for Avionics Keyboards?
- Why Silicone Buttons on Avionics Control Panels Always Need PU Coating
- Are Backlit Laser-Engraved Silicone Keyboards Only for Aviation?
- Advantages of Silicone Rubber Keypads
- Advancing Automotive Control Panels with Capacitive Touch
- Why do the silicone keypads of Avionics control panels always use backlit laser-engraved fonts?
- How to Enhance the Durability and Lifespan of Silicone Keypads of Avionics Control Panels?
- How to Improve the Tactile Feedback of Silicone Keypads of Avionics Control Panels?
- Emerging User Interface Trends for Medical Devices
- Introduction to Backlit Silicone Membrane Switches
- Rubber Membrane Keypads for Seafaring Vessels
- Benefits of Silicone Rubber Keypads
- What are the benefits of using backlight Membrane Switch in Boat navigation and instrumentation panels?
- How can I make the membrane switches in my Cleanroom Environment Monitoring Systems more durable?
- Should Cleanroom Environment Monitoring Systems Choose Backlight Membrane Switch?
- Why Should Cleanroom Environment Monitoring Systems Choose Antibacterial Materials to Produce Membrane Switches?
- Why should scratch-resistant materials be chosen for membrane switch windows in Cleanroom environment monitoring systems?
- What Should We Pay Attention to When Using Membrane Switch Materials in Card Terminal Payments?
- What should I consider when using membrane switches in Card terminal payments?
- What Should We Pay Attention to When Designing Membrane Switches in Oil Well Drilling Control Panels?
- Why is Membrane Switch So Important for Fire Alarm Control Panels?
- Display Windows of Membrane Switches: How to Prevent Scratches
- Unlocking the Future: 7 Advantages of Membrane Switches for Medical Electronics
- Advantages of Membrane Switches for HVAC control panels
- Circuit Design of Membrane Switches
- Printing and Assembly: Something You Need to Know About Membrane Switches
- Membrane Switch Ink And Eco-Friendly Printing
- One Way to Enhance the User Experience--Rubber Keypad Backlighting
- One Way to Enhance the User Experience--Membrane Switch Backlighting
- What Are the Factors That Affect the Cost of a Silicone Rubber Keypad?
- What Are the Factors That Affect the Cost of a Membrane Switch?
- How to Choose the 5 Kinds of Adhesives for Membrane Switch Panels?
- How are Membrane Switches and HMIs Tested?
- Four Methods on Improving the Service Life of Screen Printing
- Customizing the Shape of a Membrane Switch: A Comprehensive Guide
- Three Options for Adding a Cable to a Rigid PCB Front Panel HMI
- Incorporating Transparent Capacitive Touch Switches: A Comprehensive Guide
- Incorporating Transparent Capacitive Touch Switches: Revolutionizing User Interaction
- WHY FLEXIBLE CIRCUIT BOARDS NEED STIFFENERS
- How to Prevent Silver Migration in Membrane Switches?
- How Does the Ink Composition and Ink Performance Affect the Membrane Switch?
- What Are the Pasting Steps and Precautions for the Adhesive of Membrane Switch? An Expert Guide
- Membrane Switch Panel Design Reference 2 -- PET Matte Membrane Panel for Refrigerators
- Niceone Teaches You to Clean and Maintain Acrylic Panels
- Enlightening Design Suggestions of Membrane Switch Panel Display Windows
- Talking About the Development Trend of Membrane Switch Technology
- Introduction of Metal Domes
- The Quintessential Guide to Understanding the Membrane Switch of Intelligent Digital Measuring and Controlling Instruments
- Application of Membrane Switch in Lamps and Lanterns: Enhancing User Experience
- Membrane Switch Inspection Methods: Ensuring Quality and Reliability
- Precautions for Pasting and Storage of Membrane Switch
- Low Resistance Conductive Ink for Membrane Switch: Enhancing Performance and Durability
- Seven Key Advantages of Membrane Switches for Medical Electronics
- 3 Special Crafts in Membrane Switch Manufacturing -- ESD Layer
- How to Prevent Display Window of Membrane Switch from Being Scratched: A Comprehensive Guide
- Membrane Switch Panel Design Reference 1 -- Water Quality Monitoring System Operation Panel
- Why Does the PCB Membrane Switch Use Glue for Welding Wire Packaging?
- Analysis of Membrane Switch LED Failures: Identifying Common Issues
- Talking About the Development Trend of Rubber Keypad Technology
- Niceone Teaches You to Clean and Maintain Rubber Keypad
- How Does Niceone Gain the Trust of Thousands of Companies for Membrane Switch and Silicone Rubber Keypad?
- Lower Your Cost Choosing the Best Silicone Rubber Keypad Product
- Lower Your Cost Choosing the Best Membrane Switch Product
- Lower Your Cost Choosing the Best Graphic Overlay Product
- What Harm Will Low Quality Rubber keypad Bring to Your Products?
- What Harm Will Inferior Membrane Switches Bring to Your Products?
- In the design of IP65, IP66, and IP67 membrane switches, what is the difference? What to consider? Material or design?
- What Exactly Is the Difference Between IP65 IP66 and IP67 for Membrane Switch?
- How to Choose the Right Dome for a Membrane Switch
- How to Effectively Prevent LED Aging of Membrane Switch?
- What are the Size Options for Membrane Switches?
- How do you want your silicone rubber keypad to feel?
- Rubber Keypad with Molded Plastic Case: The Perfect Combination of Durability and Functionality
- Aluminium Panel Membrane Switch: Revolutionizing User Interfaces
- 6 Points of Membrane Switch Design: A Comprehensive Guide
- 6 Points of Graphic Overlay Design
- Why Are Silicone Rubber Keypads So Popular?
- Design of Membrane Switch for Hazardous or Difficult Situations
- Design of Silicone Keypads for Hazardous or Difficult Situations
- Making Keypads with Different Colored Buttons: Enhancing User Experience
- Price Critical Parameters When Designing Graphic Overlay: A Comprehensive Guide
- Price Critical Parameters When Designing Membrane Switch: A Comprehensive Guide
- Price Critical Parameters When Designing Silicone Keypads
- How do you want your graphic overlay to feel?
- How do you want your membrane switch to feel?
- Color Design of RUBBER KEYPAD: Enhancing Aesthetics and Functionality
- Graphic Overlay in Agriculture Equipment: Standardization And Application - What Materials Need to Be Considered?
- Silicone Rubber Keypad in Agriculture Equipment: Standardization And Application - What Materials Need to Be Considered?
- Membrane Switches in Agriculture Equipment: Standardization And Application.What materials need to be considered?
- Membrane Switches in Marine Equipment: Standardization And Application.What materials need to be considered?
- Membrane Switches in Medical Equipment: Standardization And Application
- Manufacturing And Tests of Backlight Membrane Switch: Enhancing User Experience
- Manufacturing And Tests of Silicone Rubber Keypad
- Manufacturing And Tests of Waterproof Membrane Switch: A Comprehensive Guide
- Membrane Switches in Electronic Equipment: Standardization And Application
- Technological Requirements of Waterproof Membrane Switch
- Technological Requirements of Silicone Rubber Keypad
- Technological Requirements of Graphic Overlays
- Technological Requirements of Graphic Overlays
- Manufacturing And Tests of Membrane Switches
- Introduction to Acrylic Sheet - Features, Classification And Technology
- Graphic Overlay in Medical Equipment: Standardization And Application - What Materials Need to Be Considered? Why is antibacterial so important?
- Design of Graphic Overlays: Text, Color, and Pattern
- How Important Is the One-stop Rubber Keypad Manufacturing?
- Color Design of Membrane Switches: Enhancing Functionality and Aesthetics
- The Difference Between Flex Copper Circuit Membrane Switch and Silver Membrane Switch
- The Difference Between Metal Dome Keys and Silver Paste (Die-pressing) Keys
- PET Matte Membrane Panel for Equipment--Production Display
- A Comprehensive Guide to the Control Keypad for Marine Air Systems--Production Display
- UV Printing Vs Screen Printing: Navigating the Differences in Membrane Panel Switch Production
- A Deep Dive into Rubber Membrane Switches/Panels: How Many Layers Do They Consist Of?
- Unfolding the Artistry of Matte Oil (Frosted Ink) in Membrane Panels: An In-Depth Guide
- Screen Printing VS. UV Printing for Membrane Switch—The Process Difference
- How Many Layers Does the Membrane Switch/Panel Consist of?
- The Troubleshooting Methods for Your Damaged Membrane Switch
- What?! Membrane Switch Have So Many Advantages?!
- To Improve the Service Life of the Rubber Keypad, You Should Know These Points!
- To Improve the Service Life of the Membrane Switch Panel, You Should Know These Points!
- What Are the Types of Back Adhesive for Rubber Keypad?
- What Are the Types of Back Adhesive for Membrane Switch Panels?
- What You Don't Know About Screen Printing in Membrane Switch Manufacturing?
- Only After These Tests, Our Membrane Switches Will Be Delivered To You: The Ultimate Guide
- Putting PU Oil Steps for Rubber Keypad
- Why Do Rubber Keypad Need Surface Treatment with PU Oil?
- Steps of Putting Matte Oil on Membrane Switch
- Why Do Membrane Switches Need Surface Treatment with Matte Oil?
- How to Install a Membrane Switch?
- Tips for Replacing Membrane Switches
- Tips for Replacing Membrane Switches
- Why Do Membrane Switches Have a Long Service Life? Understanding the Technology Behind Durability
- Advantages of Acrylic Panel Compared to Ordinary Graphic Overlay
- Why Do Graphic Lines Suddenly Become Thick During Silkscreen Printing for Membrane Switch?
- How to Prevent the Membrane Switches' Window from Being Scratched?
- How Does Niceone Guarantee the Color Accuracy of Rubber Panel/Keypad?
- How Does Niceone Do the Design Drawing of Membrane switches?
- What Are the Options for Custom Rubber Keypad Printing? How Does Niceone Make My Custom Rubber Keypad More Brandable?
- Things You Do Not Know About Rubber Keypads Materials
- Why Do Rubber Keypads Need Surface Treatment?
- What Good is a Rubber Keypad with Seamless Integration and Intuitive Operation? Specific to the Role of Different Industries
- What Design Can Improve the User Experience of Rubber Keypad? What Can Niceone Do to Help Customers?
- Silicone Rubber Keypad Market Trends: Exploring the Future of Interface Technology
- How Does Niceone Do the Design Drawing of Rubber keypad?
- How to Repair A Broken Rubber Keypad or Panel?
- How to Repair A Broken Membrane Switch or Panel?
- UV Printing Vs Screen Printing, What Are the Differences in Membrane Panel Switch Production?
- Things You Do Not Know About Graphic Overlay Materials
- Laser Cutting VS. Mold Cutting in Membrane Switch Production
- Things You Do Not Know About Membrane Switch Materials
- Why Do Membrane Switches Need Surface Treatment with Matte Oil?
- What are the Connector Options for Membrane Switches? What are their Pros and Cons?
- What Good is a Membrane Switch with Seamless Integration and Intuitive Operation? Specific to the Role of Different Industries
- What Design Can Improve the User Experience of Membrane Switches? What Can Niceone Do to Help Customers?
- Membrane Switch Market Trends: Exploring the Future of Interface Technology
- How Can the Ergonomics and Tactile Feedback of Membrane Switches Be Improved?
- What Are the Options for Custom Membrane Switch Printing? How Does Niceone Make My Custom Switches More Brandable?
- How Does Niceone Guarantee the Color Accuracy of Membrane Panel/Keypad?
- Custom Membrane Switch Design: Revolutionizing User Interface Technology
- Introduction to PCB Membrane Switches
- Membrane Switch: A Comprehensive Guide
- Rubber Keypad: A Comprehensive Guide
- China Rubber Keypad Manufacturers: A Comprehensive Guide
- The Advantages of Backlighting Membrane Switches
- How To Make A Membrane Switch
- Understanding Membrane Keypads: Components, Applications, and Advantages
- Custom Membrane Keypad Manufacturers: Unveiling the World of Customized User Interfaces
- Keypad Membranes: The Core of Modern User Interfaces
- In the medical industry, what kind of role does the silicone rubber keypad play?
- Installation and Maintenance of Silicone Rubber Keypads
- How to Delay the Discoloration and Degradation of Silicone Rubber Keyboard?
- How to Fix a Discolored or Degraded Silicone Rubber Keyboard?
- How to Improve the Waterproof Performance of Silicone Rubber Keypad?
- What to Consider When Choosing Silicone Rubber Key Pads for Outdoor Use?
- In aerospace technology, what kind of role does the silicone rubber keypad play?
- Introduction to Silicone Rubber Keypads
- What are the options for Printing of Silicone Rubber Keypad?
- Why does silicone rubber keypad have Low cost?
- What are the options for Coatings of Silicone Rubber Keypad?
- How to Improve the Backlight Effect of Silicone Rubber Keypad?
- What are the options for the Texturing of the silicone Rubber keypad?
- What are the options for the Backlighting of the silicone Rubber keypad?
- Why does silicone Rubber keypad shine in Consumer electronics?
- How to Maximize the Ergonomics of Silicone Rubber Keypad to Make it More Popular with Customers?
- How to improve the Ergonomics of Silicone Rubber Keypad?
- Do Niceone-Keypad have any production design suggestions for the button layout of the silicone rubber keypad? As Niceone-Keypad, what should we do?
- How is the color of the silicone rubber keypad done?
- What are the options for the Button Color of the silicone rubber keypad?
- What are the customizable parts of the silicone rubber keypad?
- How to Clean Silicone Rubber Keypad?
- Silicone Rubber Keypad and harsh chemicals
- Silicone Rubber Keypad's Usual Use Temperature, Humidity and High Use Environment.
- What is the relationship between environmental factors and silicone rubber keypad?
- How much is the best Key Travel for Silicone Rubber Keypad? How to choose? by what?
- How many kinds of Keycap Material are combined with Silicone Rubber Keypad? Where are their respective advantages and disadvantages?
- What affects the Actuation Force of a silicone rubber keyboard?
- What affects the tactile response of a silicone rubber keyboard?
- Silicone Rubber Keypads
- Will the driving force be affected if the shrapnel layer is combined with the Silicone Rubber Keypad? Where are the advantages and disadvantages at the same time?
- Capacitive Touch User Interfaces
- 7 Fascinating Facts about Keyboards
- Why Choose Niceone-Keypad to Produce the Membrane Switch?
- Membrane Switch Technologies: The Future of Human-Machine Interaction
- Membrane Keyboard Lifespan: Everything You Need to Know
- Mechanical Membrane Keyboard: Everything You Need to Know
- Do Membrane Keyboards Have Switches?
- Do Mechanical Keyboards Make You Type Faster?
- Difference Between Membrane and Mechanical Keyboard: Which One to Choose?
- Can You Replace Membrane Keycaps? A Comprehensive Guide
- Can You Put Mechanical Switches on a Membrane Keyboard?
- Are Rubber Dome Switches Good?
- Are Rubber Dome Switches Good? Pros and Cons Explained
- Are Membrane Keyboards Good? A Comprehensive Guide
- Are Membrane Keyboards Bad?
- Are Membrane Keyboards Bad? Pros and Cons of Membrane Keyboards
- 3 REASONS TO CONSIDER ALTERNATE MATERIALS FOR YOUR PRODUCT
- How to Combine Capacitive Switch Solutions with Backlight: A Comprehensive Guide
- V. Frequently Asked Questions
- IV. Each Layer Structure Information
- D. Benefits of Combining Capacitive Switch Solutions with Backlighting
- C. Manufacturing Process For Capacitive Switch With Backlighting
- B. Design Considerations For Capacitive Switch with Backlighting.
- III. How to Combine Capacitive Switch Solutions with Backlighting
- II. Understanding Backlighting Capacitive Switch
- Capacitive Switch in china
- Benefits of Bonding with Double-Sided Tape
- Importance of Medical Device Labels
- Membrane Switch Factory for Your Outsourcing Needs
- What is Outsourced Product Manufacturing?
- What is New Product Introduction?
- What role does conductive ink play in membrane switches?
- What are Conductive Inks and Printed Circuits?
- What does Flexible Hybrid Electronics have to do with membrane switches? And how to let Flexible Hybrid Electronics make the membrane switch more superior?
- What are Flexible Hybrid Electronics?
- What are 3M VHB Tapes?
- What is the relationship between 3MVHB and membrane switch? And what is the effect on the Membrane switch?
- What are Graphic Overlays?
- What is the relationship between Medical-Grade and membrane switch?
- Understanding Medical-Grade Materials: What You Need to Know
- Adhesives in Medical and Healthcare Products: An Innovative Solution to Fastening Methods
- Solutionsforshieldingmembraneswitchesfrominterference
- Choosing EMI or RFI Shielding for Membrane Switches
- The Purpose of Windows and Cutouts in Membrane Switch Overlay Design
- Improving the Actuation Force of Membrane Switches: Specific Measures and Future Choices
- Questions to ask when designing a-membrane switch
- 3 factors that affect the cost of a membrane switch
- Options for Graphic Overlay Sealants and Adhesives: Advantages and Disadvantages
- Introduction for Flame Retardant Adhesives
- Alternative Graphic Overlay Material Options: Advantages and Disadvantages
- Design Changes to Better Protect Internal Components with Graphic Overlays
- How Graphic Overlays Protect Internal Components
- Understanding the Versatile Applications of Graphic Overlays in Modern Industries
- Surface Finishes and Treatments of Graphic Overlays
- Advantages and Disadvantages of Surface Finishes and Treatments for Graphic Overlays
- Industries that Use Elastomer Rubber Keypads and Considerations for Each
- Integration and Customization Options for Elastomer Rubber Keypads: Advantages, Disadvantages, and Future Research Directions
- Improving the Durability and Resistance to Harsh Environments of Elastomer Rubber Keypads
- What Affects the Tactile Feedback and Actuation Force of the Elastomer Rubber Keypad?
- Custom Designs and Shapes of Elastomer Rubber Keypads: Advantages, Disadvantages, and Applications
- Custom Elastomer Rubber Keypad Solutions & Features
- The Relationship Between Elastomer Keypads and Membrane Switches
- What are the options for Elastomer Rubber Switch Backlighting? What are the advantages and disadvantages?
- The Ultimate Guide to Designing a Custom Graphic Overlay
- A Comprehensive Guide to Color Matching in Graphic Overlays
- Understanding the Two Types of Adhesive Products for Membrane Switches
- Improve your membrane switch
- Membrane Switch Design: A Guide to Creating High-Performance Input Solutions
- Enhancing Aesthetics in Membrane Switch Design with Niceone-Keypad
- What is PCB membrane switch?
- The relationship between capacitive membrane switches and Light Guide Films (LGF) can be described as complementary.
- The Benefits of Capacitive Membrane Switches: An Overview
- Understanding the Differences between Tactile and Non-tactile Backlight Membrane Switches
- Enhancing Aesthetics with the Glue-Dropping Process for Backlight Membrane Switches
- Backlight Membrane Switch Design Suggestions for Medical Equipment Customers
- What Medical Equipment Can Generally Be Used with Successfully Developed Antimicrobial Membrane Switches?
- The Benefits of Backlight Technology in Medical Devices
- If the use environment is in an environment with a lot of bacteria like a hospital, what should Niceone-keypad, as a membrane switch company, consider when designing a membrane switch?
- What can we do to enhance User Experience for membrane switch?
- Understanding the Differences between Tactile and Non-Tactile Membrane Switches
- The relationship between ELECTRICALLY CONDUCTIVE TAPES and membrane switch?
- Tactile Membrane Switch vs Non-Tactile Membrane Switch: Which should you Choose?
- Printed Electronic Technologies: The Future of Electronics
- Niceone-Keypad Enhance the Competitiveness of Your Tactile and Non-Tactile Membrane Switches:
- Enhancing User Experience with Membrane Switches - Measures Taken by the Niceone-Keypad:
- Discover the Diverse Applications of Membrane Keypads
- Material Selection for Graphic Overlay in Membrane Keypads
- The Cost-Saving Benefits of Membrane Switches for Medical Device Manufacturers
- Custom Graphic Overlays: Enhancing Functionality and Aesthetics in Industrial Applications
- Niceone-Keypad product style
- What is a Polydome membrane switch?
- We are in Dongguan, this is a magical city
Show More